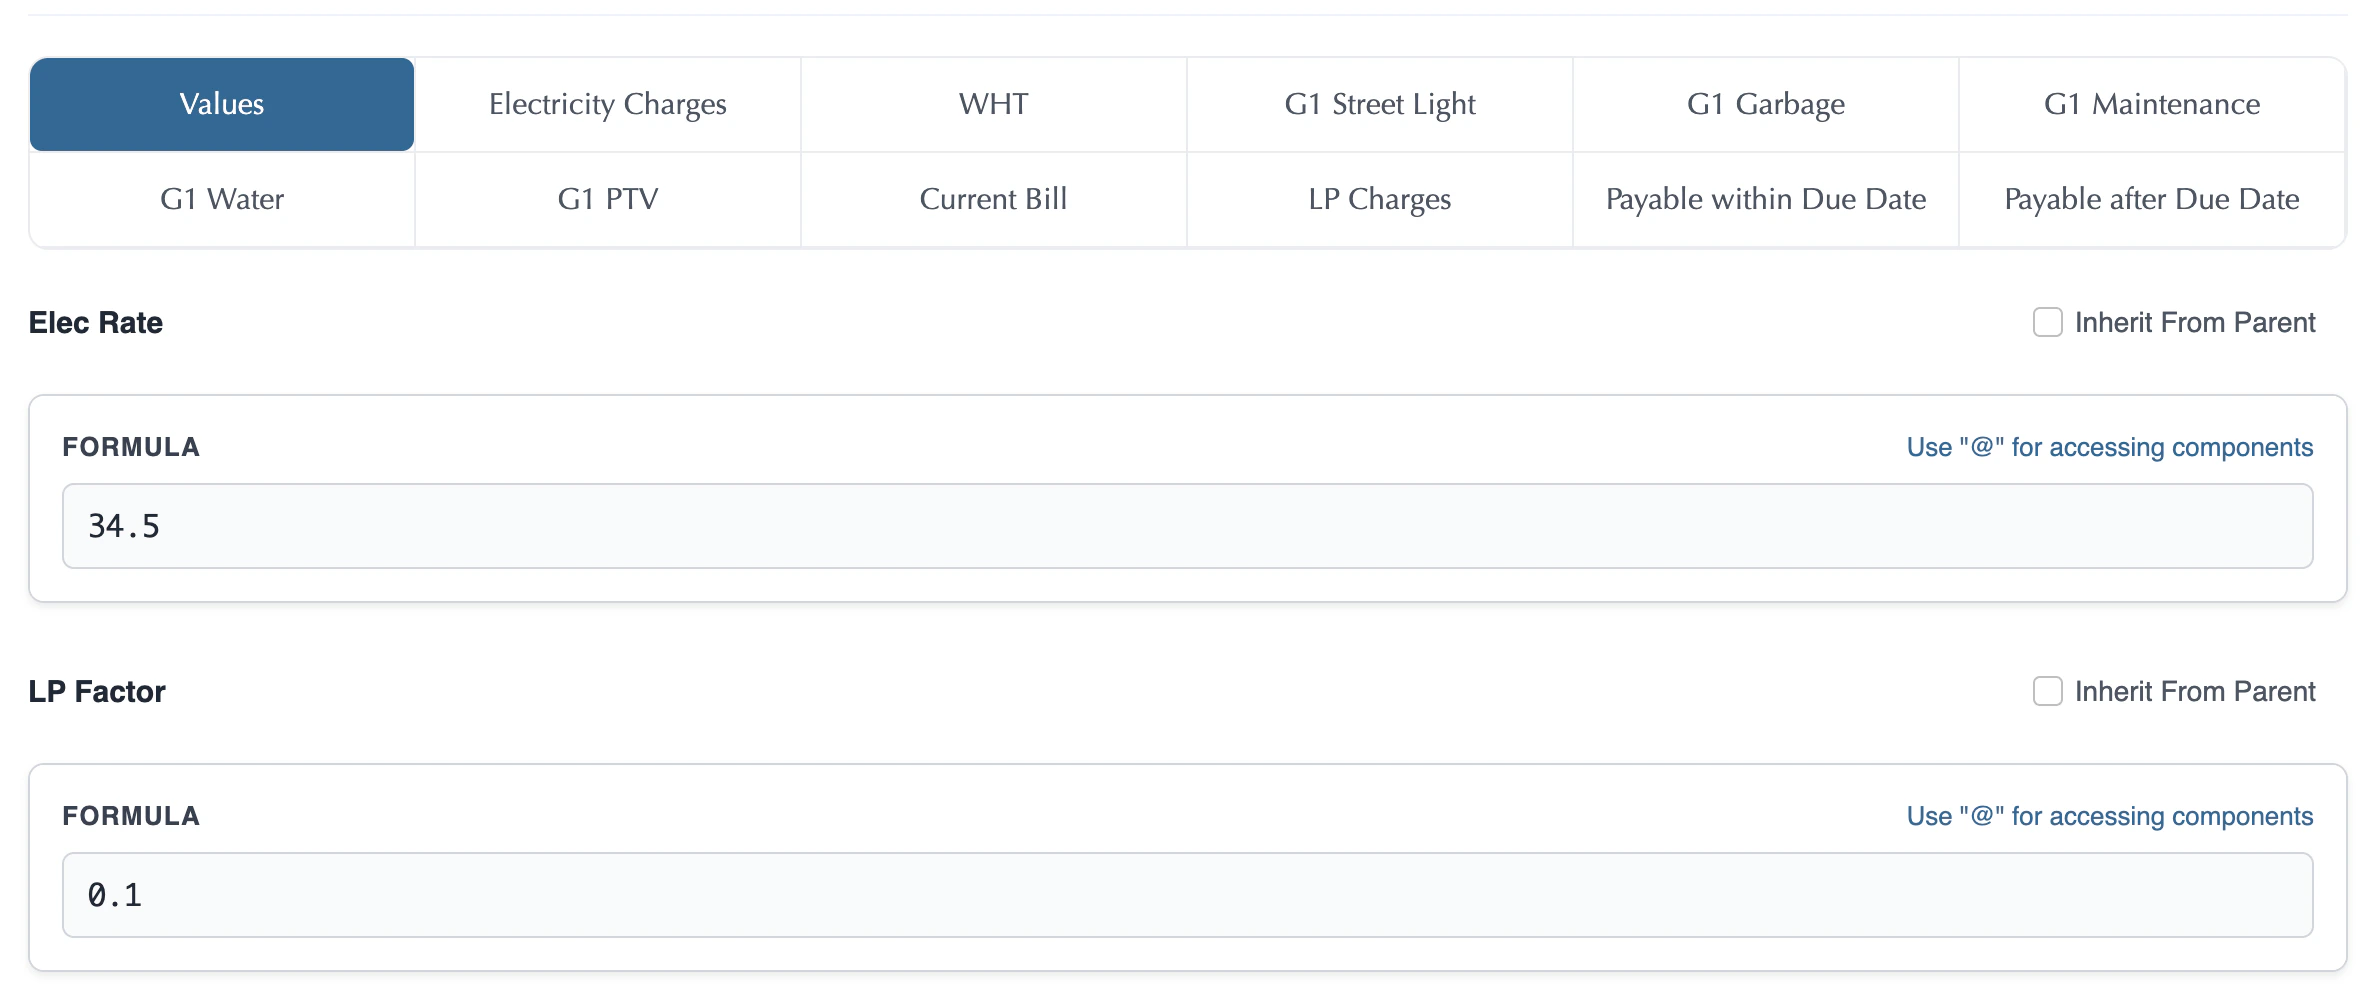
1. The Big Picture: What is a Rate List?
A Rate List is created directly from a Pricing Context. Once your Pricing Context is established, you define a Pricing Module within it. If you configure only the pricing values (the monetary values for each structural placeholder) and leave the Plan check unmarked, it instantly becomes a Rate List. By marking the Plan check as unchecked, the system makes it unsubscribeable—meaning customers cannot subscribe to it directly. Instead, it serves as a reusable master price sheet that other concrete, sellable Plans (Base Plans, Add-Ons) inherit or reference. By assigning security attributes to Rate Lists, pricing catalogs can be securely filtered based on business dimensions such as region, department, tenant, or customer segment. This ensures users only view and access rate configurations authorized for their assigned scope.2. How a Rate List is Born: Leaving the Plan Check Unmarked
In the Billspree universe, creating a modular Rate List is simple and intuitive. You do not need to manage independent rate sheets outside of your product catalog:- Create a Pricing Module: Create a new Pricing Module inside the product catalog.
- Define Values: Configure all of its basic pricing placeholders under the Values tab.
- UnMark Plan (Unsubscribeable): Toggle and save the Plan check as Unsubscribeable.
- The Rate List is Born: This Pricing Module with Plan unchecked instantly becomes a master Rate List ready to be inherited across other offerings!
- Assign security attribute to ensure Attribute-Based Access Control (ABAC)
3. Step-by-Step Configuration Guide
Step 1: Set Up the Pricing Context First
A Pricing Context is the strict prerequisite of a Rate List. Ensure your master structure (including placeholders, subscription properties, and meters) is defined first: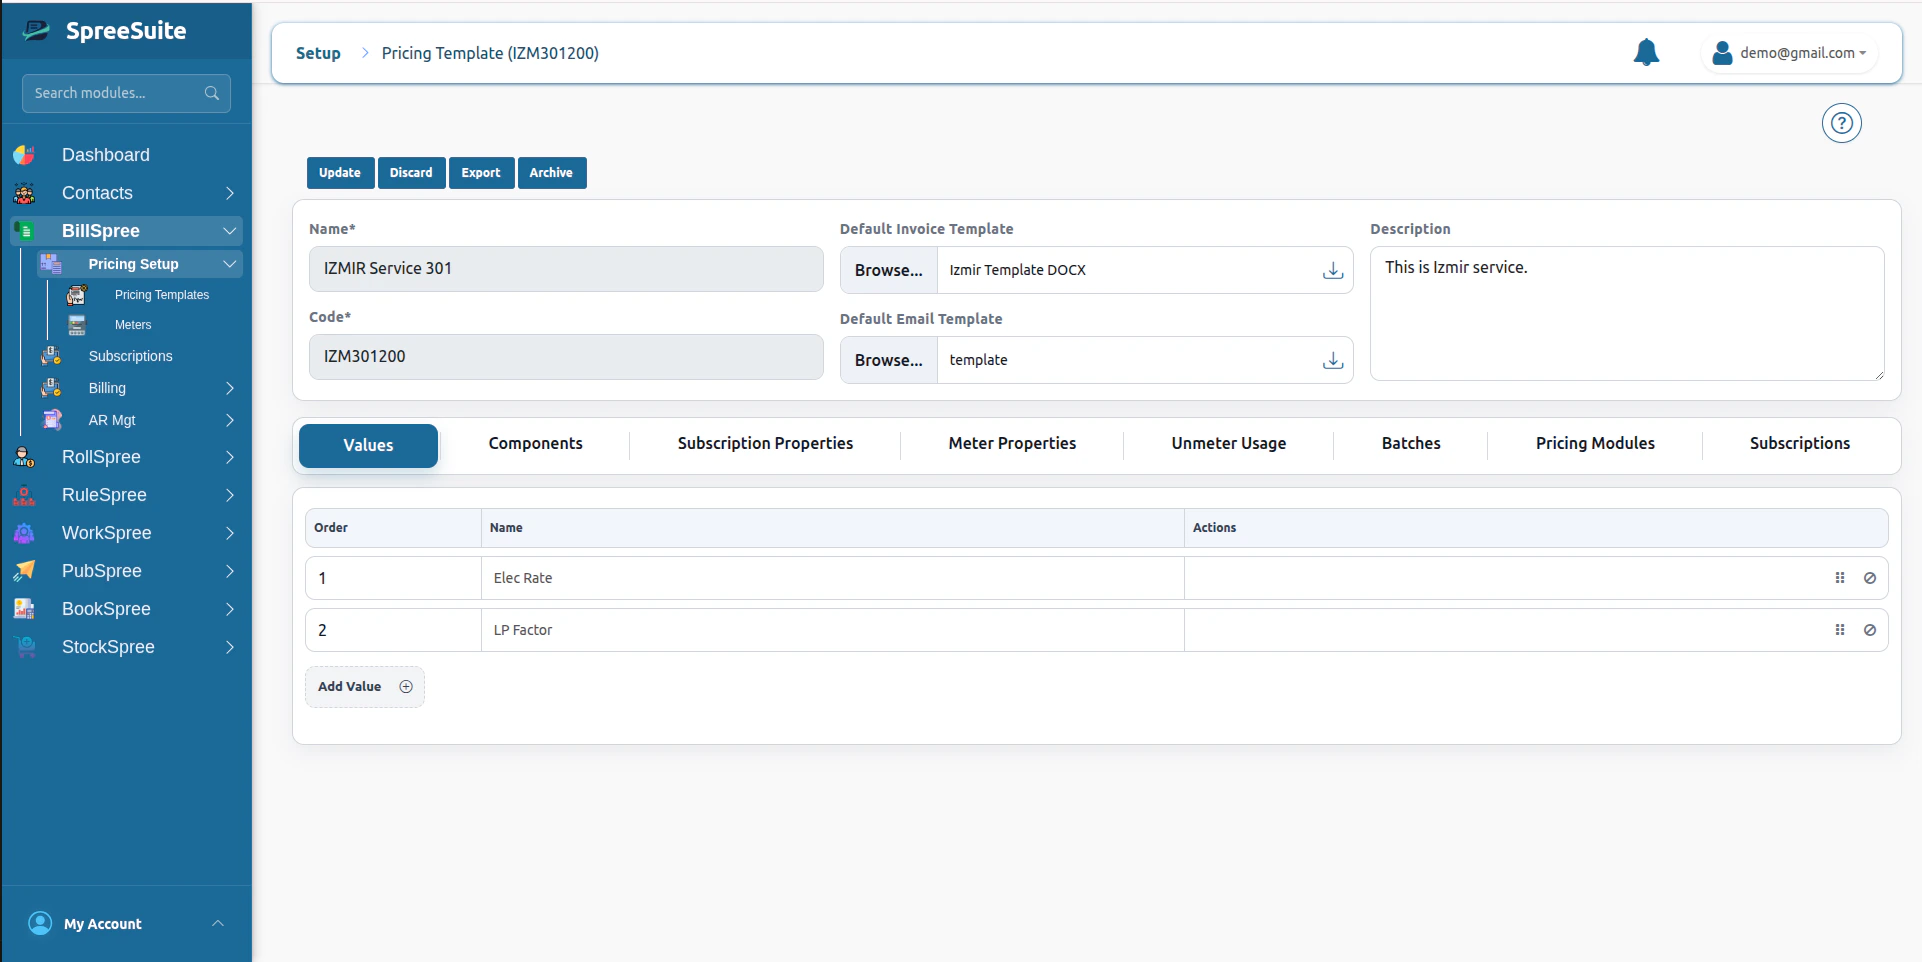
Step 2: Navigate to Pricing Module
Open the dashboard and click on the Pricing Module tab in your pricing builder console to manage your Pricing Module: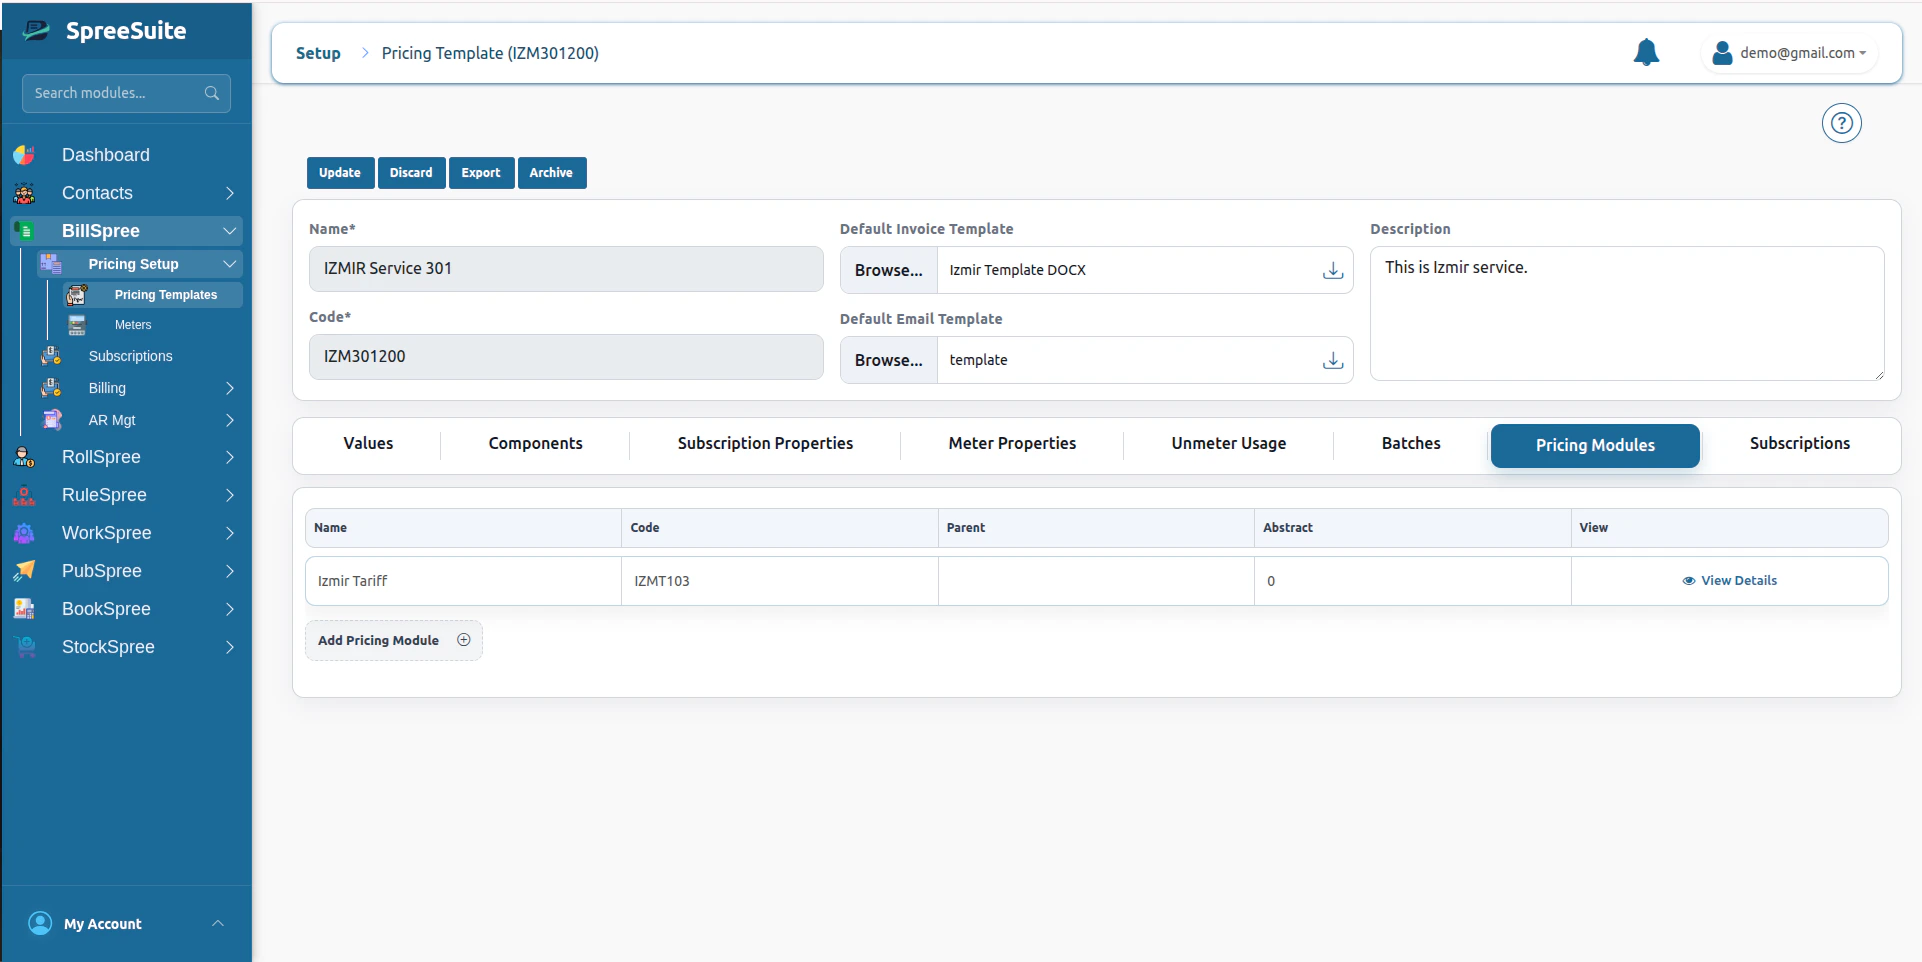
Step 3: Create a New Pricing Module
Click on the Add Pricing Module button to open the builder workspace. Here, you define the module’s identity, see Pricing Module Fields for the full field list: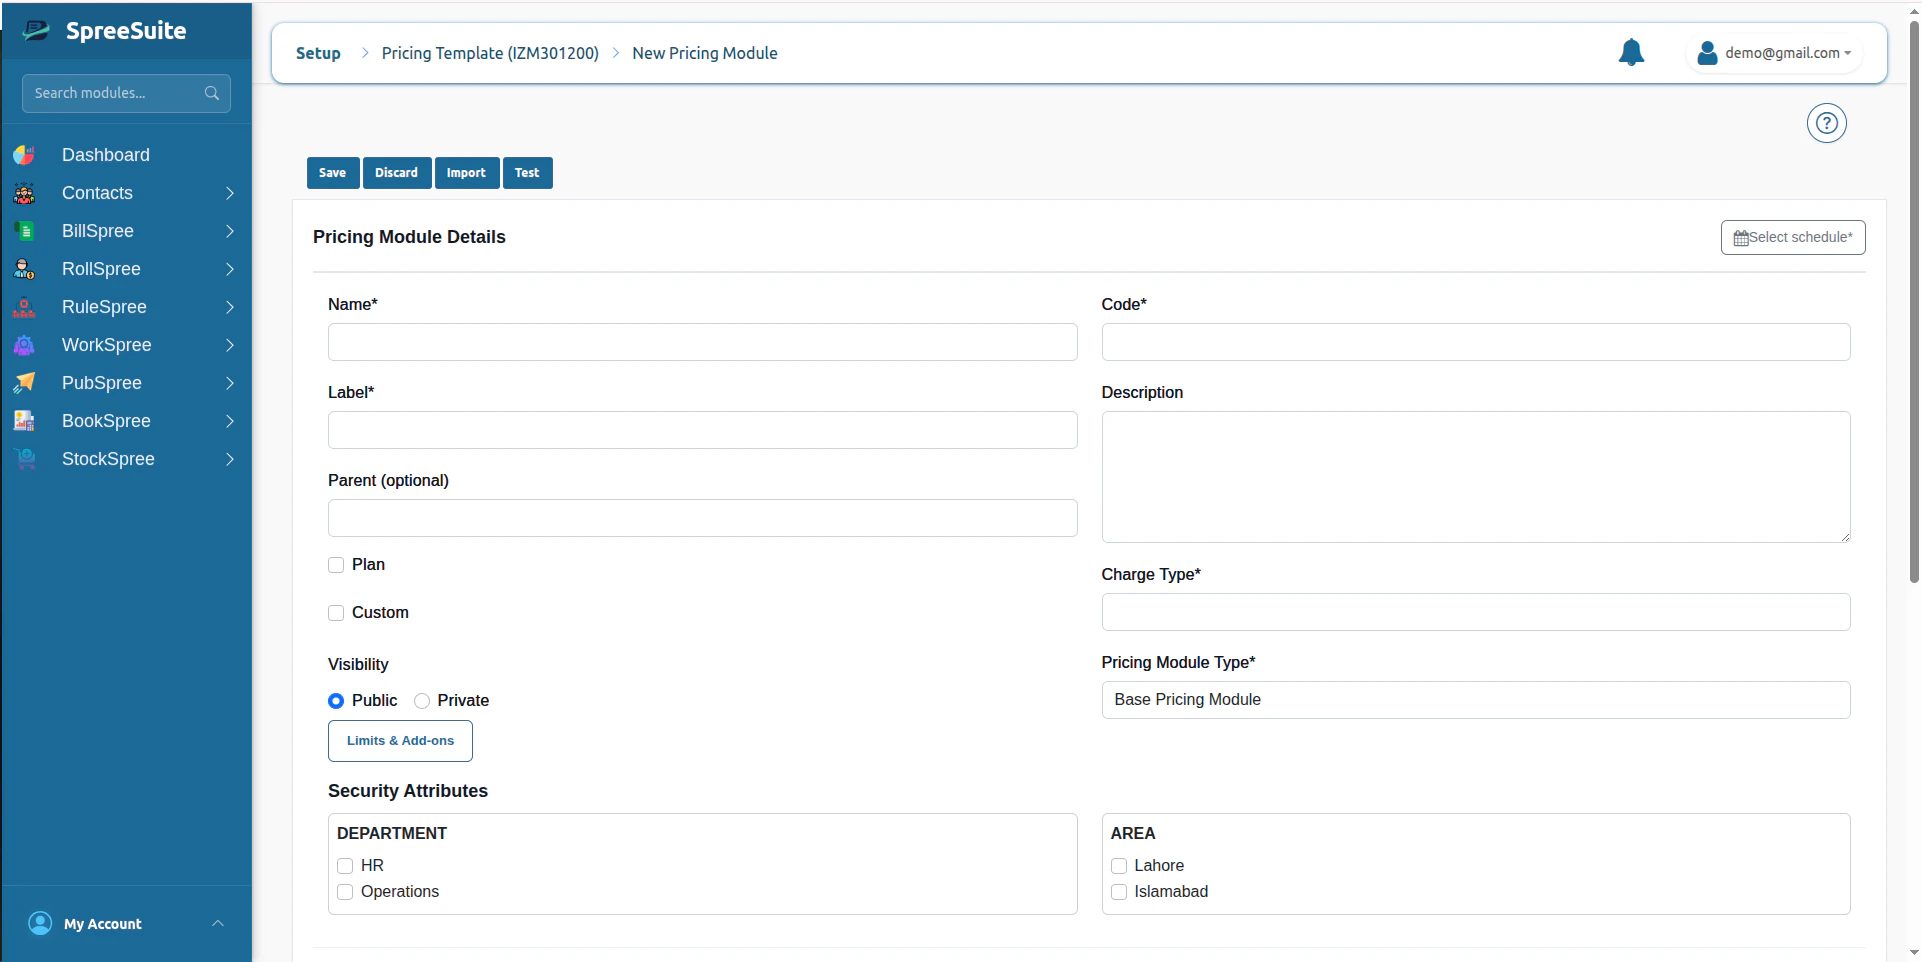
Step 4: Assign Security Attribute
Select suitable security attributes to ensure Attribute-Based Access Control (ABAC)
Step 5: Configure Values
Once created, all structural placeholders from your selected context will render dynamically inside the Pricing Module builder as individual configuration tabs: